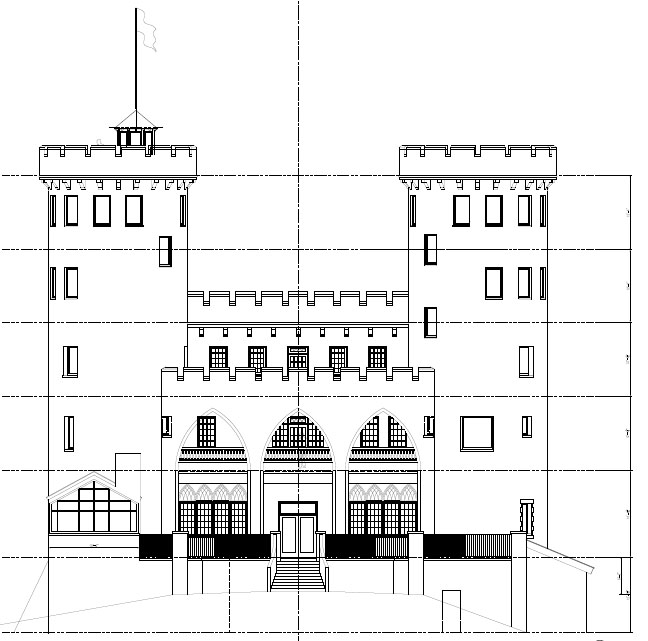
One of the main reasons to build a castle is because you like the way castles look, obviously. Otherwise you wouldn’t take on such an ambitious building project. One of the key components to how they look is the exterior stone cladding for your walls, and that can also be a significant budget expense.
I’m looking at about 30,000 sq/ft of stone wall on the exterior, and another 5,000 sq/ft on the interior. That sort of high volume means you can negotiate discounts, but it also means every additional dollar you spend per square foot really adds up quickly.
There are five main options you can use to clad your castle. Stucco, brick, manufactured stone veneer, real stone veneer, or full thickness stone. I’ve ranked them I believe in order from cheapest to most expensive.
Stucco is absolutely the cheapest, you’re not really going to find stucco castles out there in history, but many castles were built so well or otherwise coated to have very smooth walls, especially later ones, and if you used stucco but then used real stone trim around windows & doors, or at corners, it can look okay. You won’t be able to pull off the look of an early castle, but later castles (which were mostly used as palaces) often had the smooth look. Stucco can last awhile, but it doesn’t have near the longevity of the other items
Brick castles are not really common, and included in brick would also be brick veneer. But it was used as a building material and you may be happy with it and able to pull it off. Lots of gothic revival castle like structures from the early 1900s were done with brick, and you might be able to find some really old true European castles that used it as well (quarries were not always conveniently located). Brick is fairly cheap, and brick masons are cheaper than stone masons so you save on install. You can do full thickness brick where a brick wall is essentially built just outside your building’s structural wall, or brick veneer where thin brick is adhered to your building’s structural wall.
Manufactured stone is essentially brick, built the same way, but made to look like stone. It is usually only sold as veneer you apply to your wall. From a distance it looks really good, but up close you can usually tell it isn’t real stone. It is usually more complex to install, needing more labor than regular brick, but it is cheaper to install than real stone because it is much lighter and easier to handle. Weight also matters for the freight costs of getting it to your build site.
Both brick and manufactured stone last darn near forever, mortar can fail but brick tends to keep on chugging along.
Thin veneer stone is where they take real stone, and saw it to be an inch thick or less, and then it is adhered to your wall. It is much cheaper and easier to install than full thickness stone, but more expensive than manufactured stone veneer. It isn’t available, or availability competitively priced, everywhere in the country, as it relies on a good supply of local stone.
Full thickness stone is usually 3+ inches thick and is built like full thickness brick. A second wall is built outside your structural wall with stone. This stone is by far the most expensive option, it is expensive, heavy, takes a long time to install, and requires the most specialized labor. The freight can be killed if the quarry isn’t close to your build site.
Stone of course, also lasts forever.
For my project I explored the last three options. I had bids on full thickness stone of about a million dollars, ~$30 sq/ft installed. This was not affordable in the least. Thin veneer stone I was able to get for less, around $12 sq/ft installed, and I would have gone with it, except I really need to hit my budget numbers and need to find savings where I can. Because of volume I was able to negotiate manufactured stone veneer down to $9.5 sq/ft installed, which saves me almost $100,000 over thin veneer stone at the volume of 35,000 sq/ft.
My stone mason did a mockup for me, overall I want a dark grey stone with light trim accents, so in the below mockup I choose the middle dark stone color.

Exterior Wall Stone Mockup
For the actual trim, like for window trim etc. There are also a variety of options. You can use standard aluminum brickmold style window trim, precast stone trim (a very fine concrete essentially), architectural foam trim (foam coated with a stucco like product made to look like precast), or cut stone. Turns out my mason figured the cheapest way would be to just buy flagstone (about $1 sq/ft) and cut it as needed. It’ll look a little more rustic than precast would, but I like rustic. We haven’t quite figured out what to do for corbels and some of the other exterior architectural details yet.