Cabinets and Painting

We’re in the home stretch, supposedly, we’re still having hiccups on the exterior but on the interior we’re basically to the point where all materials are here, they just need to be installed.

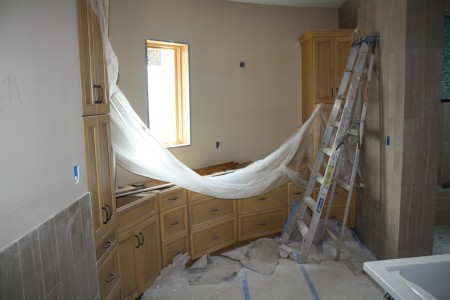
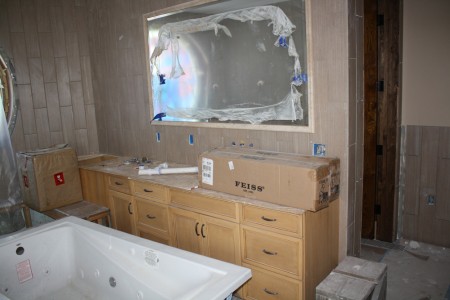
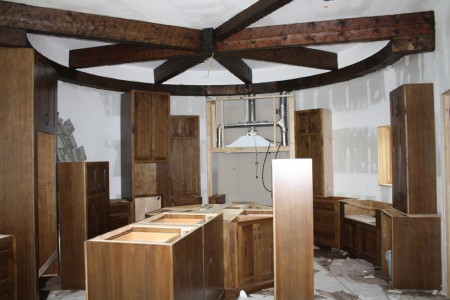
The very first countertop was just installed, that was a bit of a fluke though, the rest are several weeks out. As of now though we have the master bathroom cabinets installed (and they have been for a couple weeks), the kitchen ones are in process. We’ve had the lowers installed, including my absolutely massive island, but the uppers were apparently measured wrong so there are problems. But that shouldn’t interfere with the countertop being measured and getting into production. We’ve also had vanities installed in two of the bathrooms, one of which also has it’s countertop.
IMG_6637IMG_6638
IMG_6623
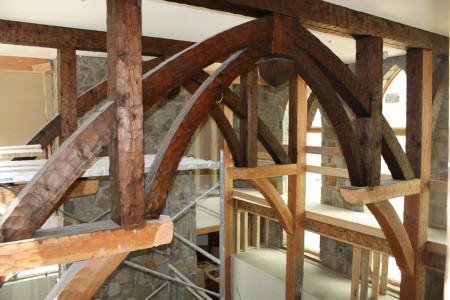
Meanwhile paint has started and is ongoing, and painting includes also staining all the wood, and there is a lot of wood. This is another thing I want to talk about where we get the “castle price.”

So way back when I call this place for a quote for us to put into our budget for paint. He tells me on the phone it is a dollar a square foot, and he says it somewhat defensively like I will claim it is too much. I say “of wall area?” He says no, of floor space. If you have a 3,000 sq/ft home, it is $3000, and that includes walls and ceilings, and all wood and wood trim. I say “Are you sure, it’s a castle with high ceilings and lots of trim and its huge.” He says, doesn’t matter, a dollar a square foot.

I still don’t believe the guy so I double it and put that number into our budget.

This guy isn’t some fly by night guy, he is the biggest in town he’ll tell you, he drives a hummer, he has tons of crews out working for him. So I figure he knows his stuff. So we have (had, actually some space was sacrificed on the altar of the budget) 13,000 conditioned space which would be painted, and so I had doubled the budget number for paint to $26k. This guy comes back when we actually need him to finalize his quote, his original estimate of $13,000 became $75,000 when he saw the castle.

I’m not a crazy person, nor am I made of money, nor am I uneducated. I didn’t win the lottery and had no clue how much things cost. I’m a small business owner who built my business scrapping and bootstrapping all the way, I’m intelligent, educated, and a compulsive researcher. I know when I’m being bamboozled. I had most of my house painted before we moved here, it was a much smaller house, 2200 sq/ft, but we painted most of it, two coats, and we had really bright paint underneath and were going to light neutrals so it took a lot of paint to cover, and we had all this complex trim in that house they had to cut in against, it wasn’t new construction with the big open areas. This painter we hired was very professional, he also drove a very nice truck (Ford Superduty with lots of chrome), and had multiple crews. It cost me $1200.

We went and got another paint quote, this guy came in at under $35,000 dollars, and he was doing more than the $75,000 guy, who only committed to one coat of finish on all the wood (the cheaper guy is doing 3 coats), and wasn’t using the products I wanted either. So guess who we went with? And the less expensive guys are doing a fine job, and they are very professional, and it is still a larger company with multiple crews. All the drywall is getting primer and at least two coats, all the wood is getting stain and three coats of finish.

What products am I using?

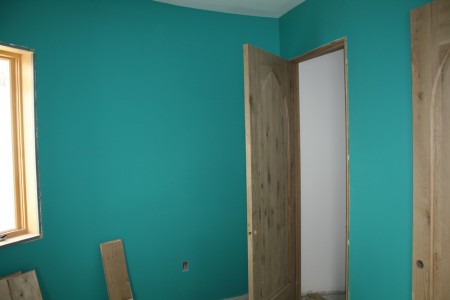
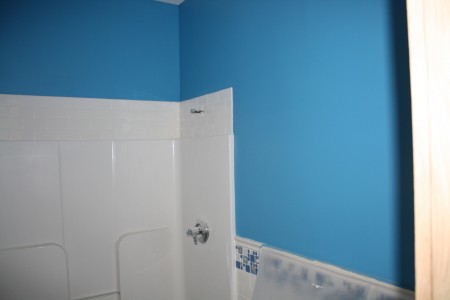
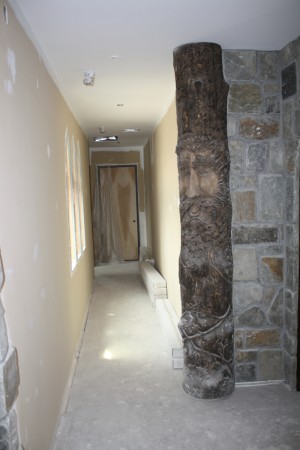
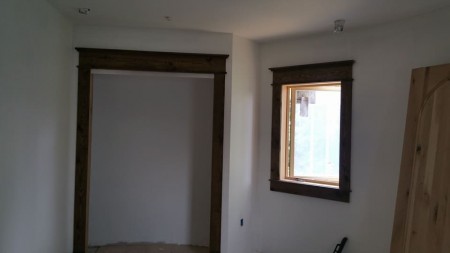
For paint we’re going with eggshell latex paints. I tend to like glossier paints, I like both the look at their durability and ability to not show my kids fingerprints etc, but I get that they’re not trendy. In my old house we used all gloss or semigloss, so going down to eggshell is less glossy for us. Also I think the glossier look is more period accurate. I let the kids pick the colors for their rooms and bathrooms, and I picked different colors for some of the other bathrooms. For the walls in 90% of the house we went with a bright white color called Swiss Coffee – this is also period accurate as well as white washing walls was about all they did back then. So the main colors of the house are dark grey stone, dark brown wood, and bright white.
IMG_6629IMG_6632IMG_663119260637_1521938707869015_2052693896516565430_n
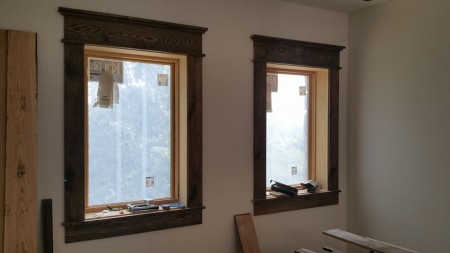
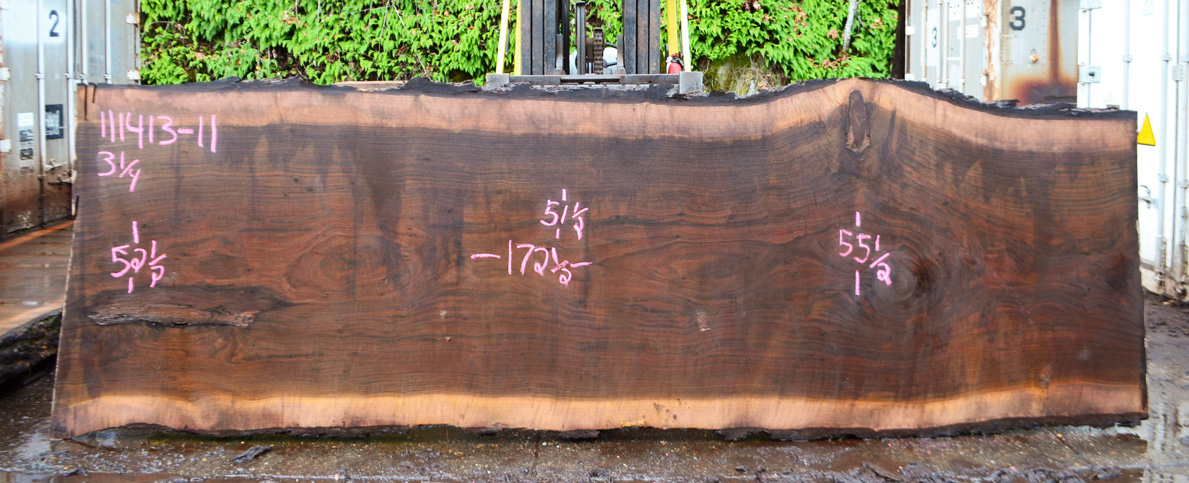
For stain we’re using Minwax’s Jacobean stain, and then for a sealer we’re using one coat of amber shellac and two coats of clear shellac. Shellac is a glossy wood top coat and sealer made from shell secretions of the lac bug that are ground and suspended in alcohol. It is one of the oldest known wood finishes and so is period accurate. It also gives off no bad VOCs or odors. When applying it smells like whiskey, it is safe enough to eat in some forms (in fact it is used on food and as a coating for pills, the stuff you put on your wood might have additives so I wouldn’t drink it), and it dries in minutes. Polyurethanes take hours to dry, during which time debris can fall on the wood and mar the finish. This also helps with labor. If you’re shellacking a door and start at the top, by the time you get to the bottom the top will be dry. It is also spot repairable. If you have polyurethane finished wood and you want to repair a damaged spot or scratch, you need to do a lot of sanding and or refinish the whole piece, or you’ll have a bump. With shellac you just slap on some more and it merges with the lower coats, it takes seconds. I really like using it and I’m surprised so many people don’t know about it. Clean up is also easy, just use ethanol.
IMG_6626IMG_662719274778_1521938677869018_5433260908452940033_n
It comes in both clear and amber, I am using one coat of amber and two of clear because that gives just the right color I like. The only downside of shellac is it doesn’t stand up to water near as well, especially repeatedly getting wet or having standing water. So you shouldn’t use it on a floor, and I am not using it on my windows which could be left open in the rain or get condensation drips. On the windows frames we will use polyurethane.

Flooring Going In

We’ve started flooring the 3rd floor and the kitchen are done. We’ve had other flooring done for awhile now if we consider the tile in the bathrooms but here I’m just referring to the wood flooring.

I have around 10,000 sq/ft of wood flooring and that is a pretty big budget line item so I really had to shop around and try to get the best deal on it, using, every dollar per square foot I could save was $10,000 in my pocket. I ended up getting what I wanted from Hardwood Bargains.com Guy V. over there took good care of me, they had good customer service, and were able to get me what I wanted, which because of the quantity and the specificity was a custom run from a mill. I have 7″ wide white oak engineered planks, character grade with knots and whatnot, lightly wirebrushed, unfinished.

Engineered vs solid was a choice to make, in the end it came down to price and availability. The main benefit of solid wood is that it can be sanded a bunch of times, whereas engineered can only be sanded 2 or 3 times. I plan to never sand my floors so that isn’t a benefit at all to me. Meanwhile engineered is cheaper, more uniform, more dimensionally stable, less likely to cup, warp, or twist, and can also better be installed over concrete subfloors, of which I have a small amount.
IMG_6635
Why unfinished? The plastic/etc coatings on prefinished wood floors are fine and nice and they will never look better than the day they’re installed. They do not look old or antique and they never will, and they’re also quite expensive. I do not like prefinished floors, some look very very nice, they do, but if they ever get damaged and you want to repair you generally need to sand the entire floor down into the wood.

So we’re putting down this wide plank unfinished wood floor, and then we’re applying Watco’s Danish Oil in Black Walnut. This is another product so many have no familiarity with that I really like. It is again something they used to use a lot more often a long time ago and I think it is coming back into vogue. It is a combined penetrating sealer and stain, it both protects and colors the wood, and it does so by seeping into the wood and hardening. It isn’t a top coat, it doesn’t go on top of the wood, so you walk on the wood, not a sheen of something synthetic. So over time the wood gets a little worn and antique looking, which is desirable. You also never, ever, need to sand your floor. If you have any sort of texture on your floor be it hewn or wire brushed you can’t sand it because you’ll remove that texture, but that means you can never refinish if you have a urethane finished floor (something you’d otherwise want to do every 8 or so years). Like the shellac I like for my wood trim, Danish Oil is spot repairable, if you have a damaged spot you just pour more on, let it soak, wipe it off, boom done. No sanding required.
IMG_6636
It also applies very very easily, unless polyurethane or similar floor finishes where the guy is down on his hands and knees carefully brushing on a smooth finish, you literally just pour this on the floor, and push it around using a squeegee or brush, let it soak, and then wipe it up. I had a guy, who was either giving us the “castle price” or was quoting based on his own lack of experience, tell us $2 a square foot to apply this. Our current flooring installer is just charging us hourly to do it. He did the entire kitchen which is almost 500 sq/ft for $45. What is that 10 cents a square foot? He had never used it before but is now sold on the benefits of the product. It makes a nice floor, colors very evenly, is super easy to use, and has super easy future maintenance and repair.
IMG_6634
The goal is for my floor to eventually look like an old pub floor you’d find in England that was laid down two hundred years ago, and these products will allow me to get there.

Masonry Heater

We ended up going with a masonry heater for our great hall. I didn’t know what these things were before I started this process so I had to learn about them.

Originally what I wanted was a double sided see-through fireplace. The problem was we couldn’t find one that would work with our situation of having a very tall flue. The taller your flue the more draft it has, which means wind passing over the top sucks air out faster or something. Modern wood burning appliances are tested to function within certain parameters for flue (chimney) height, there is a concern they will get too hot and cause a chimney fire if the flue is too long.

I ended up cutting the fireplace in the basement for this reason. But I wasn’t going to go without a wood burning option in my great hall, I mean, come on, it is a great hall.

So a masonry heater is not a metal fireplace box or wood stove, but as the name suggests, built entirely out of masonry. And additionally the smoke’s path goes up, then goes down, then goes back up, so they’re making it even longer, all out of masonry. There is a firebox, then above it a secondary combustion chamber, and then the snaking masonry passage for the smoke. Mine also happens to send some of the flue gasses through a pizza oven, so yay!

The point of all this though is to make the firebox super hot so it burns up all the flammable smoke. There is no creosote buildup because the creosote burns up before it collects anywhere. It gets super hot and generates an immense amount of heat on only a small amount of wood. One or two fires is enough for heat to radiate from it all day…. and there are no flue height restrictions so bingo.

So I got a double sided see through masonry heater, with an attached pizza oven, and it fits the space well because of the width required for the down then up flue channels. However, the one downside is it doesn’t have that epic large opening you might think of in a castle, something you can throw a whole pig into or something. My builder was concerned about this fact, he felt the door was too small compared to large open fireplaces. Overall this is much much larger than any fireplace, but most people just see the door and wouldn’t realize that. But I was sold on having one of these, plus pizza oven.

This won’t heat the house alone, but I’ll be able to put my 20 acres of oak and hickory to use providing a super comfortable radiant heat during the winter, and of course pizza. It will get epically hot enough though that there is no way we will be able to use it to cook pizza in the summer.

I shopped around quite a bit for this, and ended up buying it from Maine Wood Heat (it also of course required a skilled installer). They had the best option I found and I also really liked some of their door styles with their gothic arch detailing.

If you’ve never seen a masonry heater before I recommend doing a Google image search, there are some really neat ones out there.

Masonry Heater

Masonry Heater

Mine still needs to be all dressed up with stone, it is sort of naked now, but the guts are all in.

Castle Great Hall Feast Table

I have ordered the top for my table. I have always dreamed of have a big slab table, and I love walnut, how you get the different colors between the sap wood and the heart wood, so it was always going to be a walnut slab table top.

Walnut Slab Today, Great Hall Table Tommorow

Walnut Slab Today, Great Hall Table Tommorow


I got this from Goby Walnut. I’m sure there are other places one can buy a giant walnut slab, but I have not found them. This slab is 4 and a half feet wide and 14 feet long. It should sit 16 people, possibly more if people get friendly. One of the dreams I’ve had is being able to host my whole family for a holiday, parents, in-laws, brothers (I have 3) with their families. Getting everyone around a single table would be special.

14 feet is just about the perfect size for my great hall. Currently in my existing house we have a semiformal dining room (I hesitate to call it formal considering what the kids do to it) and we have a nice 6 foot mahogany inlaid table that can grow with the aid of leaves to 10 feet, and it barely fits with the leaves but it is nice for parties, this slab will be both longer and wider, and it’ll not feel crowded because the room is so large in the castle. It will also be heavy, so heavy it is unlikely to ever be moved. The top itself is 800+ pounds, once the legs are on it’ll go up more.

Sometimes you see these slab tables and they’re finished with a very modern sort of look, ultraflat, ultrasanded, etc. I’m hoping to achieve a more rustic finish, some degree of unevenness on the top (not so much though that cups will be spilled). I am not sure how we’ll finish it, other than not polyurethane. Possibly a penetrating oil of some sort so that the wood continues to wear and age and get character, or maybe a shellac. I like natural wood finishes, polyurethane and similar finishes never look authentic.

I as of yet have not picked out chairs for my great hall. I sort of like these beefy rustic chairs but I could also see going with something fancier like this but in a different color of course. Whatever I choose I am going to need like 20 of them so it will not be a small purchase.

Castle Interior Design

I sometimes get questions about what our castle will look like on the interior, and coincidentally I just saw an ad in a magazine that epitomized it pretty well.

Castle Interior

You could call it “mountain rustic” or ever a variation on log cabin or western styles. There are three key elements.

1. Exposed grey stone
2. Dark wood
3. Plaster-like walls in an antique white.

That is the color pallet, grey, dark brown, and antique white. This is very similar to western or log cabin styles except our wood stain is darker than those styles typically use, and instead of western motif decor we’ll have gothic or celtic style decor.

What is important to understand is that I am not building a time capsule. Some people like to do that, and that is fine, but that is not my taste. I am not trying to pretend I’m living 500+ years ago, I’m trying to pretend that my house was built 500 years ago, but it has been lived in continuously, and has evolved over that time period.

So on the first floor we’ll have exposed “bones” of the house where you’ll see exposed stone and wood beams and the like, but also there will be parts that look like they were done maybe in the 1920s (such as, electric lights). Public areas of the 2nd floor will be similar, but with less stone, and on the 3rd floor or above it will just be house, no specific style. Nice oak trim through out, but just regular drywall, nothing too special.

In designing the house, the overall shape of the house was dictated by my desire for a castle, but the interior was nearly 100% dictated by what I though would be the most comfortable configuration for our lifestyle. I tried to envision my family living there, how we would function, and designed the house to that purpose. I located things like stairways and bathrooms at locations I thought that would be most convenient to us. So inside, the decor will have this unique old character to it, but the layout itself is very modern. Open flowing rooms, pretty much the entire 1st floor is one giant room, it is sorta bifurcated by the central staircase, into maybe two big rooms, or one giant doughnut of a room, depending on your point of view. The rooms on upper floors are also all typically larger, which is of course not typical in older houses.

There will be very little “fancy” in the castle. We are not “fancy” people and we are not building a palace. No hand inlaid italian marble murals. No custom curving mahogany stairways. The flooring we want to use should look like it came right out of an old pub, very well worn. Many of the other wood elements will have rustic finishes on them. Most of our light fixtures are wrought iron. Rustic really is the key word here. In that respect we’re sticking to a more traditional castle interior, not a later manor house or palace that can be called (erroneously in my opinion) a castle. Castles were military installations, and derived their architecture and other features from their needed function, not any aesthetic desire. The exception will be the master bathroom because, come on, its the master bathroom. The most private room in the castle, and we’re making it fairly modern and fancy. Otherwise the only thing potentially fancy will be the stained glass in the windows, because I love stained glass.

Not Much to Report

Do I have a loan? No. I have three banks working on it, I’ve paid for more appraisals. The most recent appraisal was the highest yet, putting my loan-to-value (LTV) at 44%, and yet still no finalized loan. I do have “preliminary approvals” at two banks but I’ve heard that before.

Business is doing good to the point where I’d almost be there to just self finance, and I think perhaps in another year (maybe two) I could indeed to do that, not need a bank at all, but I don’t want to wait, still, you’d think with my strong financials getting a loan would be the least of my problems.

I have however recently done two interesting things. The first is I found a coppersmith to make me a custom copper sink. I found them on eBay actually and I asked them if they could customize one of their designs. I’m really pleased with how it turned out. It is a large copper farm house style apron sink with two bowls and 5 square quatrefoils on the front. There is a slight concavity to the front face, which will allow it to blend in nicely with our countertops, which are curved along the outside wall of one of the towers. See the kitchen post. This was $1500, which if you’ve ever priced out as sink like this is a great deal, of course I bought it direct from the fabricator, not from a middleman.

My Custom Copper Sink

My Custom Copper Sink

The second thing I bought is a sconce. This is also a custom design. I saw this light fixture at Disney world hanging off Cinderella’s castle and I had to have it. Of course that one was maybe 6 feet tall, mine is half the size, but it has all the style. What I particularly liked was that it didn’t have a fake candle. I’m not a big fan of fake candle light fixtures, I like the light bulb to be enclosed in shaded glass or something (in the case of my sconce it is mica, which is technically a rock, just a sort of flexible rock crystal they can cut so thin as to make it pliable). Glass shades give you greater flexibility in bulb types as well. I also liked how the metal came up and formed a basket around the glass. Finally, and importantly. I liked the angle of it. I see a lot of “torch” sconces where the torch is held parallel to the wall, but I don’t think that is period correct and I simply also prefer the look where the torch angles away from the wall. This thing is custom made in Texas, is solid steel, 3 feet long, weighs a good deal, has a nice antique finish on it. $380, I am getting a little bit of a discount because I’m buying in bulk. We’re going to need a bunch of these sconces all around the 1st floor interior. Neat huh, and I also think it is a good deal.

This is my sconce, there are many like it but this one is mine.

This is my sconce, there are many like it but this one is mine.

My Sconce, Front View

My Sconce, Front View

My Sconce, Side View

My Sconce, Side View

The inspiration for my sconce, see on Cinderalla's Castle at Disney World.

The inspiration for my sconce, see on Cinderalla’s Castle at Disney World.

My sconce was done by Iron Gallery LLC, I shopped around and they gave me the best deal and all told I’m super impressed by the quality of the work. In addition to doing lighting they do other things like doors, and I tell you what it is really hard to find giant metal 10 ft x 4.5 ft gothic arch castle doors on the shelf at home depot, and we plan to use this same company to do both some of our other light fixtures (like the ginormous one in the great hall) but our custom doors as well. Actually one of the doors I picked was one of their stock doors, if you browse their site maybe you’ll find it, it is square but with a gothic arch window.

One of the goals I have with my blog is to reputationally reward the suppliers used on the build. For two reasons, one because people who do good work deserve credit, and one because I know how hard it is to find some of this stuff and I hope to be helpful to any future would be castle builders. So I plan to plug the vendors contractors and everyone else I use as I use them so long as they continue to perform and provide me deals and do good work and all that jazz. If I wanted to be funny I could say it is like reverse product placement, instead of them paying me, I pay them. I really need to figure out how to do it the opposite way…

So that is all, when I do have a loan, which could be by the end of this month if I’m lucky, or by Valentine’s day, or maybe not until this Summer if I’m really, really, really unlucky, I’ll post here first thing.

Reclaimed Gothic Doors

Nothing beats new construction in terms of quality, energy efficiency, or ease of installation, but generally nothing beats old construction in terms of quality, story, or cachet. Many times when people are building historic houses they like to seek out reclaimed materials to add character to their construction. We are largely not doing this.

We have a copious amount of beams in the construction, and using reclaimed wood would be nice, but its very expensive, and even though we’re building an amazing home, we still have a budget. You can buy new timbers that have been hand hewn to look old for less than old timbers. Same with flooring.

However, I have purchased a few items for integration into the castle that are antiques.

The first are a set of doors. These gothic doors with stained glass transom were salvaged off the Ruffin Nichols Memorial African Methodist Episcopal Church in Philadelphia prior to being demolished. This church is pre-civil war, and was built in 1844. These doors I purchased were made of American Chestnut, a species of wood extinct in the lumber trade due to blight. I think it is utterly cool that when entering my castle you will walk through gothic doors from 1844 from a tree that can no longer be grown for lumber (the blight kills all chestnuts prior to reaching harvest age now).

Ruffin Nichols Memorial Church

My builder was not too excited about this when I first told him I wanted these doors, he was rightfully concerned about trying to get them to work, to fit snugly, energy sealing, and the like. However I simply told him I wasn’t planning to use these doors an exterior doors, but interior ones. I imagine in fact they’ll be open most of the time. You see our house features an entry vestibule, a gatehouse or barbican. You essentially enter the front door (which will be newly manufactured, and bronze), and find yourself in a small room with another set of doors to enter the house proper, it is this second set of doors that I am using these reclaimed doors for.

1844 Chestnut Gothic Doors

When I saw these doors, with a total height of 10 feet, and the gothic detailing, I knew they would be perfect for this spot with my first floor ceiling heights of 12 feet.

1844 Chestnut Gothic Transom

I also purchases a couple antique wood mantles from around the 1920s.

~1920s wooden mantle

There is a possibility that someone else will catch my eye, but at this point I do not plan to purchase any additional antique salvage building materials.

Curved truss beams for a timber framed great hall

Every castle has to have a great hall, a tall ceiling room with a roaring fireplace and a large table. My castle is no exception. In more contemporary architecture the great hall, still found in a wide variety of homes, is built with a sloped roof, and there are no certainly no floors above it, the hall simply has a ceiling as high as the structure in which it sits, be that commonly two stories, or rarely three stores. So while the timber framed great hall look is prevalent in many homes, of different styles and types (log homes or lodges especially), the trusses used to frame the ceiling (ostensibly to support the roof, but they’re often not structural, merely decorative) are peaked. This was not going to work for me.

The central square of my castle is 3 stories high, my great hall will only have a two story roof. The floor system we’re using between floors is a steel system that takes up two feet, my first floor has 12 foot ceilings, the other floors 10 foot ceilings, so that makes the overall ceiling height in my great room 24 feet, but it has a flat ceiling, so I needed to come up with a truss design for a flat ceiling.

Easy right? You just make an upside down U, problem solved. Sure, that’d work, but I wanted something fancier. I know that timber framing has a function, but I find it beautiful, evocative of a different era. And indeed in times past much artistic creativity was spent on these structural features, because they were so evident and obvious and would be looked at for decades if not centuries.

Being at this dream for years, I had reviewed many truss designs online and in books, and I knew I liked curved beams. I knew, of course, they would be expensive, but curves are special, on a woman, and on a house. I’m a fan of work like Gaudí’s, though it wouldn’t be appropriate for my castle to incorporate his stylings. I like arches and domes and vaulted ceilings and round windows and curves. My eyes were always drawn to trusses with curved elements, and I wanted to pursue that. But how?

I went through many iterations of what exactly I wanted, one small curved cross piece, curved corbels, and then I hit upon existing work that I loved and decided to copy. This was later, when it solidified that the castle would be gothic, and I started to specifically look for gothic style trusses. I found ones I loved.

Westminster Hall, which is today part of the British Parliament compound, was build in 1097 by the son of William the Conqueror (true story, according to Ancestry.com he may be a very distant relation, in as much as you can trust thousand year old information). It features gothic trusses which I really liked.

As you can see though, the ceiling is sloped, so I had to edit them slightly.

Then, could I afford it? My kitchen, being in a round tower, is going to feature a round ceiling beam. My architect had gotten that quoted at a place that would laminate and bend the wood, it was more than my car. Yeoch! I got a quote from Specialty Beams out of Montana, who claim to have big saws and other equipment exclusive to the country and are able to manufacturer big curved beams. They’ve got quite a gallery on their site, and have even supplied beams to Disney World. They wouldn’t do it as one round beam, rather in sections, with each joining area hidden with a corbel, on which they could carve a gothic face (think gargoyle, though they’re called grotesques, not gargoyles, when not used as waterspouts off a roof), which I had requested. Price? Much much more realistic.

So, I sent them my beam idea for quoting and I recently got it back. I need two trusses and it is going to cost me about $4000 per truss, which seems reasonable to me. These are big wood timbers, the biggest being 10x10s, and they’ll be finished with a hand scraped finish to make them look old. They can also add a couple more gargoyle faces for me. Here is what they came up with.

Truss Design for Great Hall

It might look a little funny with the side kickout, but then here is my great hall which may explain it:

Great Hall

So, I did something that is probably a little unique here, but it is an idea I had years and years ago and it always stuck with me. If you’ve read my other blog posts you know I’m trying to build a legitimate realistic castle, or as close enough as I can, and part of that means limiting windows and limiting them close to the ground. However I do not want to live in the dark so I’m putting in a center shaft with a large skylight to bring light to the interior. I also did not put any windows on the side of the building on the first floor, instead placing them high on the walls. I guess, similar to St Peter’s Basilica if you’ve been there. Certainly inspired by the high windows in cathedrals (I call them my cathedral windows). But then I realize that if my first floor is 12 feet and my second floor is 10, I can’t start windows at floor level, so at most I’d have 8 or 9 foot tall windows. That didn’t seem tall enough.

So you see little steps and a little ledge. The steps take you down to 8 feet over the first floor, if I then start my windows a foot or two above the floor of that ledge I have 14 foot tall windows. That seemed to be the scale I need. And indeed, looking at exterior elevations, anything shorter would have looked squat with the gothic arch top. So I’ll have big 14 feet windows, but they won’t start until around 18 feet off the ground on the exterior, which should hopefully maintain the defensive look I am after for authenticity. And if they don’t, well, it is on the side away from the road facing the forest, and I don’t know if the deer are architectural critics.

The plus side here is I get this long narrow storage closet. I mean, we all hate having to drag chairs up from the basement when we have a lot of people over for dinner right? Now imagine you’re in a castle and your basement storage area is quite far away because your house is so large. I knew I needed and wanted more storage near the kitchen and near the dining room, and this was an easy way to get it.

So, the great hall is actually the section framed by this little balcony, but on the second floor level the ceiling goes all the way to the exterior wall. Even though my trusses will not be structural, they need to look structural, or they will look funny (a good rule for these sorts of things, make things look like they’re needed). So the little side kickout “supports” the ceiling above the balcony near the cathedral windows.

On the exterior you see some buttresses, why? I wanted them, my wife has a fascination with buttresses (hardy har har) though she likes the flying ones you see on Notre Dame. Buttresses were an old way to stabilize walls from lateral forces. Much like the trusses on the interior keep the walls from falling in, the buttresses on the exterior keep the walls from falling out. Of course my building will be modern concrete & steel, the buttresses are not need, but they would have been used specifically in these places, between the high windows, to hold up this high otherwise flat wall, as seen in churches and cathedrals all over, so I wanted to include them. I have a thing for architectural details.

Our Ideal Castle Kitchen

So much design thought lately has been going into what we want our kitchen to look like. I do all the cooking in our house, so I definitely have my own ideas. We also want the kitchen to look fairly period correct. Rustic, old, but not lose function.

We’ve made some decisions, we are going to do a grey flagstone floor throughout the whole 1st floor, and will continue that into the kitchen.

We are leaning strongly toward a soapstone countertop with a chiseled edge like in the below picture. Probably a soapstone farmhouse style sink as well.


We want stone work on either side of the range and surrounding the hood.


For cabinetry we want to go with a rustic oak, full inset cabinet doors, lots of drawers & pullouts vs. fewer doors. Some glass insets on the uppers.

Overall, our favorite kitchen we’ve found is the below picture:


We like all the little details about this kitchen. We’ll use the stone flooring, and we’ll put the stone countertops on the Island as well, and we want the stone around the range. But we do like the backsplash here, the wall colors, and especially the use of beams, especially that big rustic soffit beam.

A problem is our kitchen is in a tower, and so is round. This makes everything harder and more expensive. Today I’ve been trying to get an
estimate on making a beam that we can use like that soffit beam in the picture, but having it be curved as needed.

Kitchen Layout